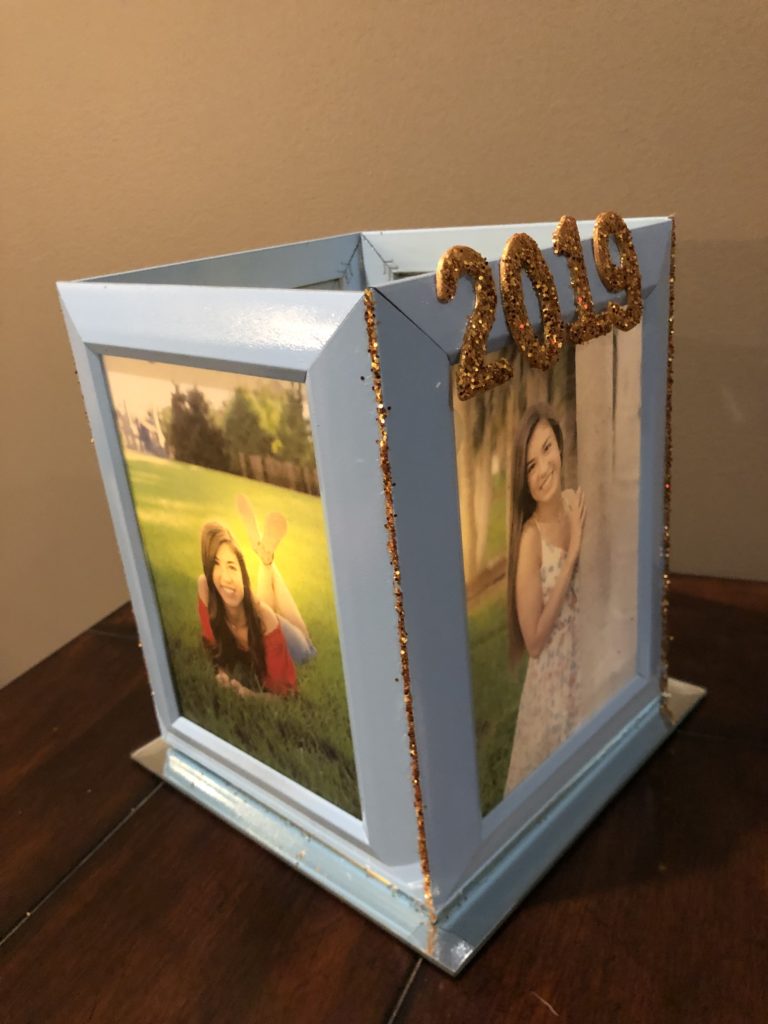
Graduation Party DIY Centerpiece: A Stunning Photo Frame Luminary
Planning a graduation party and looking for a unique centerpiece idea? This DIY photo frame luminary is the perfect way to showcase memories while adding a warm, glowing touch to your celebration. With just a few simple supplies, you can create a personalized graduation centerpiece that highlights the graduate’s journey in a stylish and meaningful way.
Disclosure: This page may contain affiliate links. If you purchase through these links, I may earn a commission at no extra cost to you.
Why a Photo Frame Luminary is the Perfect Graduation Centerpiece
A photo frame luminary is more than just decor—it’s a keepsake that captures special moments. Here’s why it’s a great choice for your graduation party:
- Personalized & Meaningful – Display photos of the graduate’s school years.
- Elegant & Eye-Catching – The soft glow of a flameless candle adds a beautiful ambiance.
- Budget-Friendly DIY – Made with affordable materials from Dollar Tree, Walmart, and Hobby Lobby.
Supplies Needed for Your DIY Graduation Centerpiece
- Four 5×7-inch frames – Dollar Tree frames work perfectly.
- Four 5×7-inch pictures printed on vellum paper – Creates a soft, glowing effect.
- 8×8 mirror plate – Adds a reflective base for extra elegance.
- Spray paint – Optional for customizing frame colors.
- Acrylic paint & wooden numbers – Great for adding the graduation year.
- Glue gun & glue sticks – Essential for assembling the luminary.
- E6000 adhesive – Provides extra durability.
- Mod Podge & glitter – Adds a decorative touch.
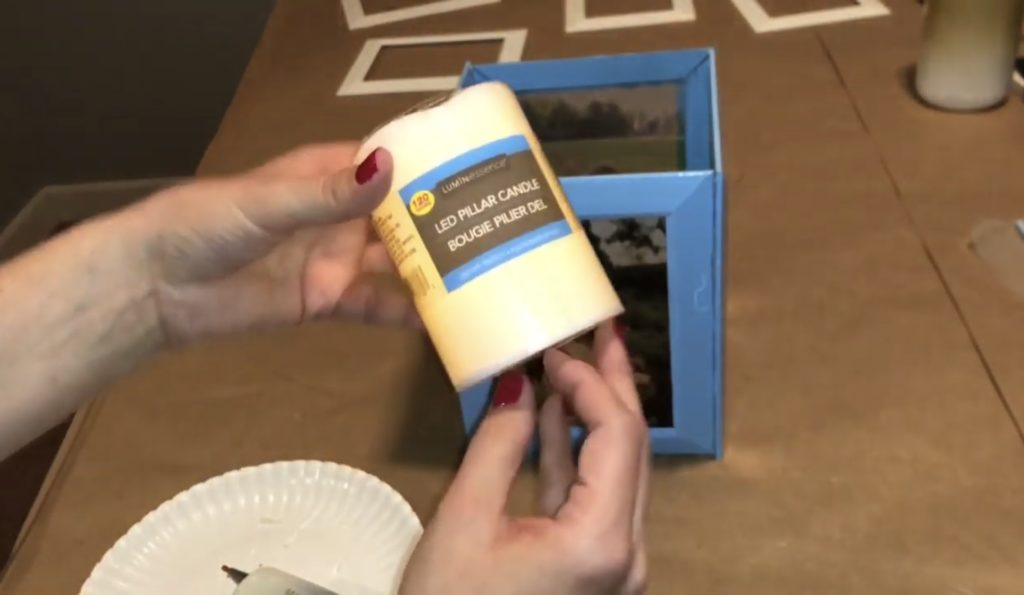
- Flameless candle – Creates the glowing effect inside the luminary.
- Four 5×7-inch frames – I got mine from the Dollar Tree
- Four 5×7-inch pictures printed on vellum paper – I got my vellum paper at Hobby Lobby
- 8×8 mirror plate – I got mine at Walmart
- Spray paint (if you are painting your frames)
- Acrylic paint for painting numbers (if you use numbers) – I got my numbers at Dollar Tree
- Glue gun and glue sticks
- E6000 adhesive
- Mod Podge
- Glitter
Step-by-Step Guide to Making a Graduation Photo Frame Luminary
I’ve also embedded the YouTube video below for those that prefer to watch the video.
1. Prepare the Frames
- Clean the glass thoroughly to ensure a clear display.
- Remove the glass and backing from each frame.


2. Paint & Customize the Frames
- Apply two coats for a smooth, even finish.
- Spray paint the frames in your chosen graduation colors.

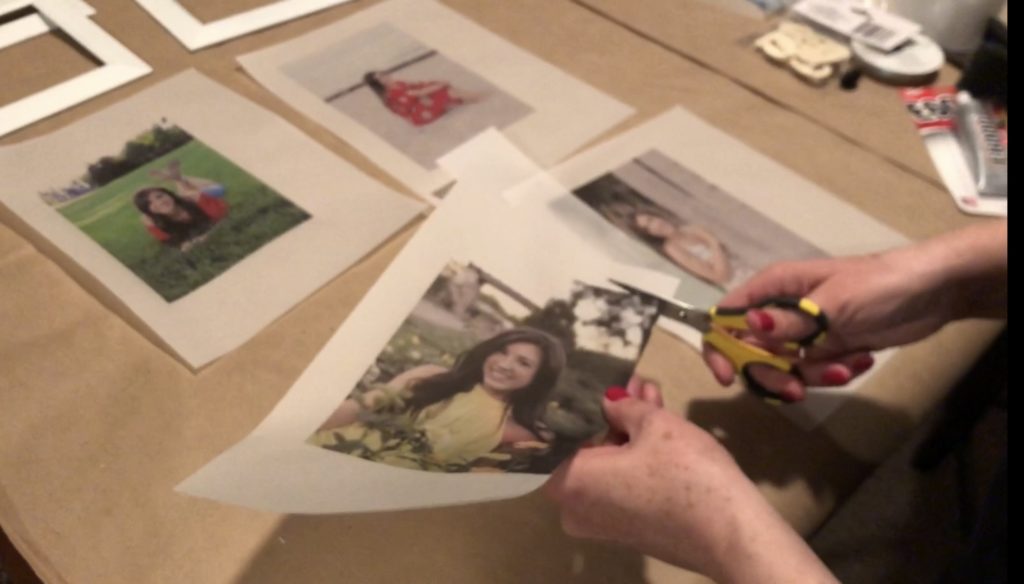
3. Print & Cut Photos on Vellum Paper
- Cut the photos to fit the frame using the glass as a guide.
- Print graduation photos on vellum paper for a soft, glowing effect.

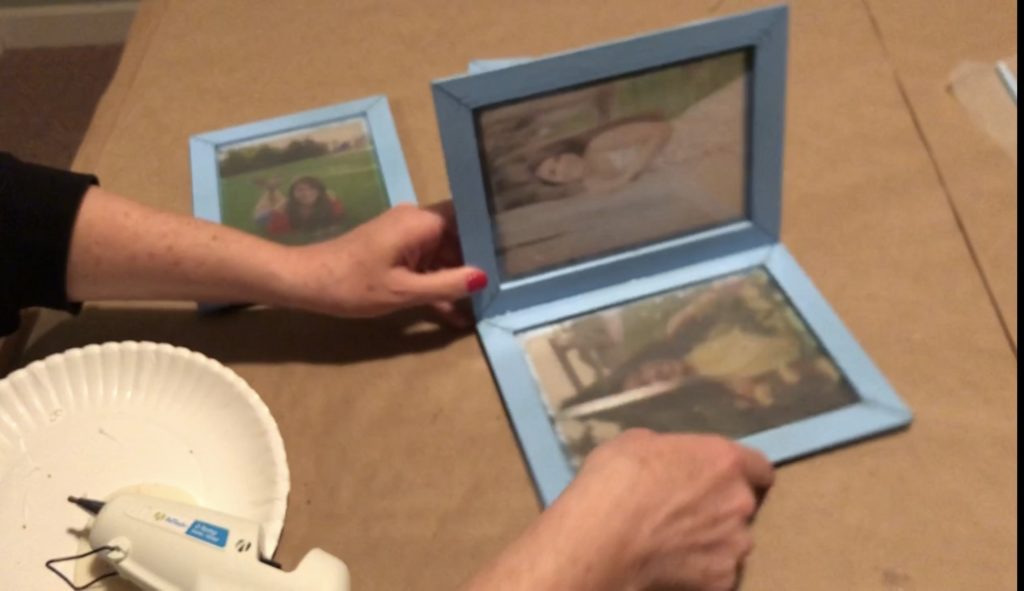
4. Assemble the Luminary
- Secure the luminary to an 8×8 mirror plate for a polished look.
- Glue the vellum photos inside the frames.
- Attach the glass over the photos for protection.
- Connect the four frames to form a square, alternating the placement for a seamless fit.


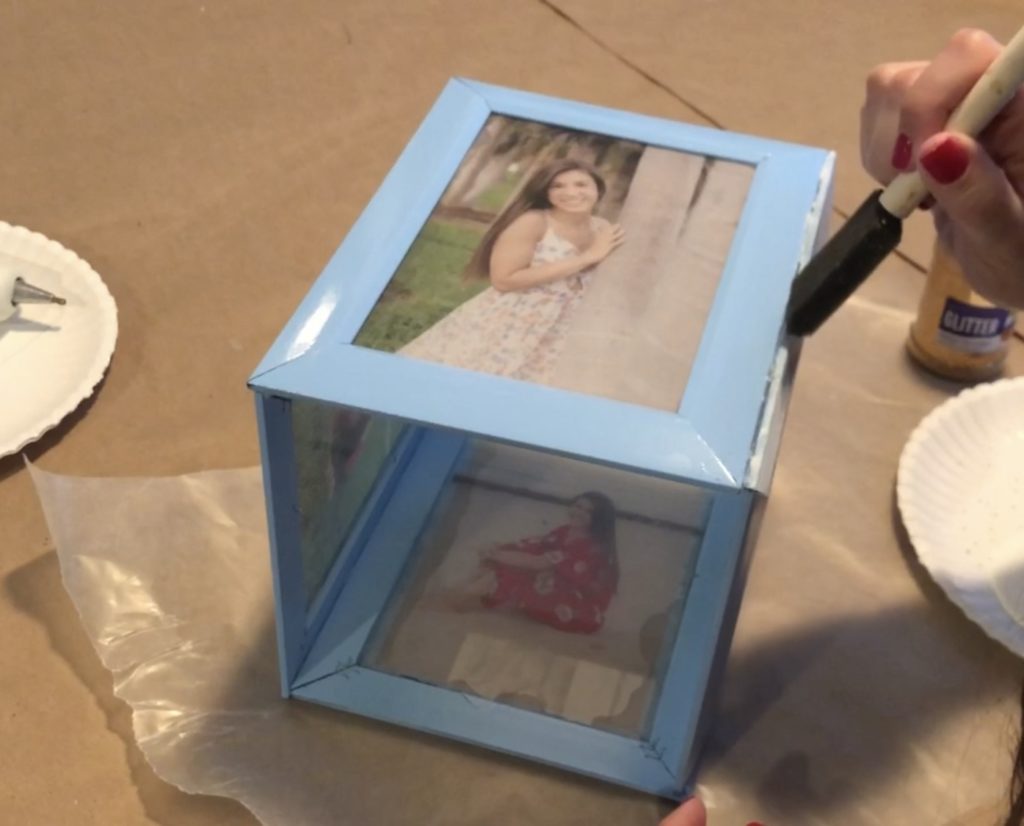
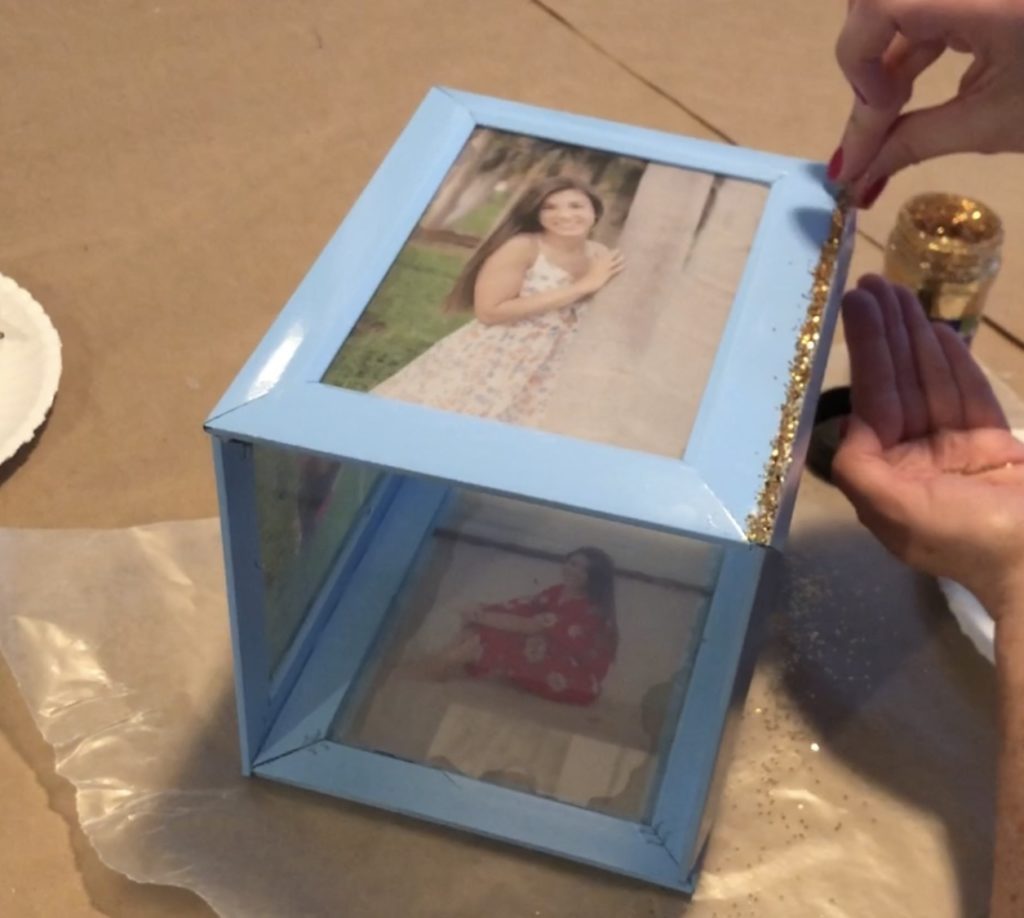
5. Add Decorative Touches
- Paint wooden numbers with acrylic paint and attach them to the luminary.
- Apply Mod Podge and sprinkle glitter along the frame edges.


6. Place the Flameless Candle Inside
- Insert a Dollar Tree flameless candle to illuminate the photos beautifully.
Graduation Party Styling Tips
- Coordinate colors – Match the centerpiece to your party’s theme.
- Use multiple luminaries – Place them on guest tables for a cohesive look.
- Pair with other decorations – Complement the centerpiece with balloons, banners, and floral arrangements.
More Graduation Party Ideas
Looking for additional creative decorations? Check out these ideas:
- Photo Booth Backdrop Ideas
- Cotton Candy Station
- S’mores bar
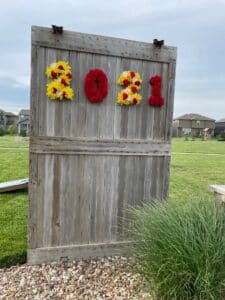
- Graduation Senior Table Photo Poster
- Graduation Party Centerpiece (with pom poms and pictures)
- Graduation Photo Guest Book
- Another Graduation Photo Guest Book
- Dr. Seuss inspired Guest Book
- Card Box ideas, includes request for guests to address envelopes
- Graduation Card Box
- Graduation Centerpiece in galvanized tin
- Graduation Centerpiece in mason jar with pom poms
- Graduation senior board
- How to make a popcorn bar
- Frame Luminary
- Senior Table Photo Poster
- Photo Displays for Graduation Parties
- Hinged Frame with photo clips idea
- Graduation Money Gift Box
- Flower Pot Graduation Cupcake stand
- How to make a Donut Bar
- Graduation Party Sign Ideas – Easel Signs with Vinyl Letters
- DIY Cake Stands for your Food Bars
With these ideas, your graduation party will be both memorable and stylish!