DIY Faux Leather Earrings: Bar Earrings
Bar earrings are so easy to make on your Cricut machine.
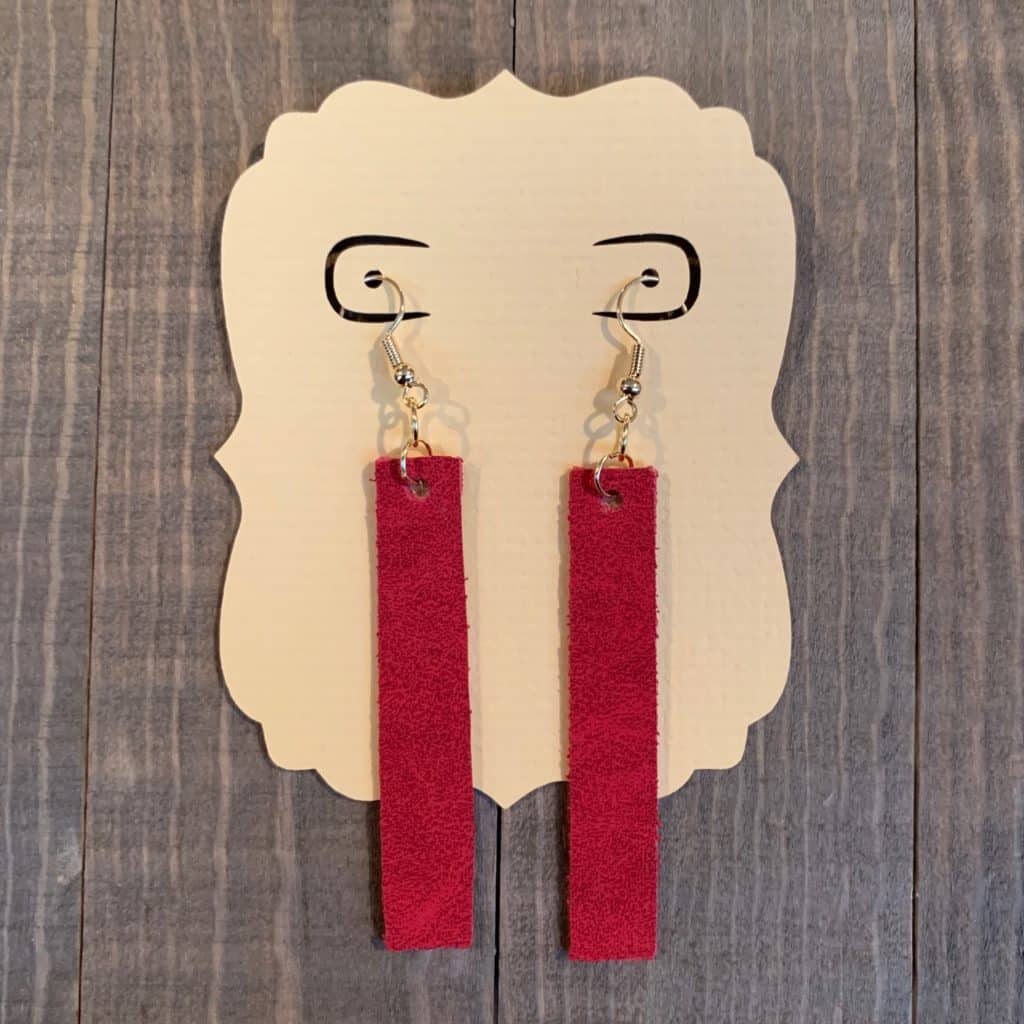
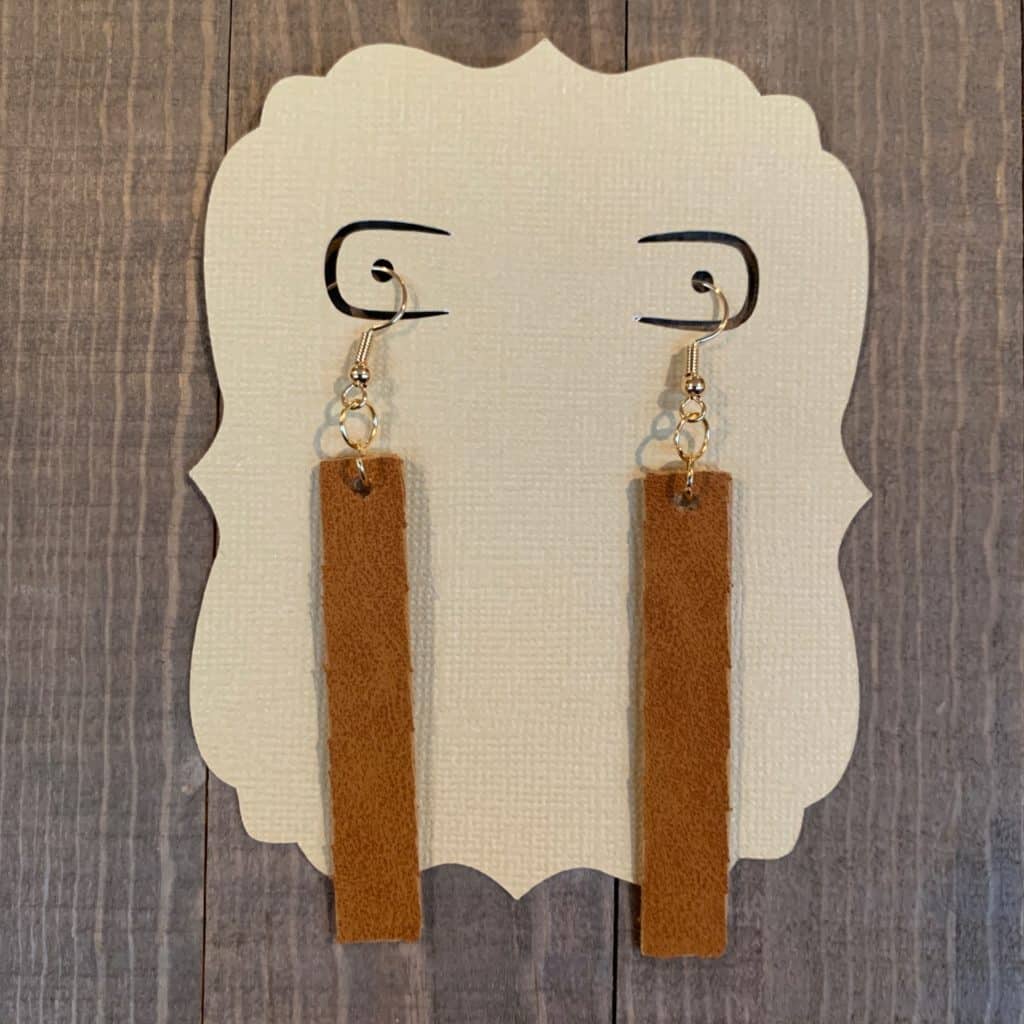
Next time you’re making diy faux leather earrings, give bar earrings a try. Bar earrings are great because you can make them as tall or short as you’d like. Vary the width for a different look as well. Make them with faux leather, genuine leather and even cork sheets.
Disclosure: This page may contain affiliate links. If you purchase through these links, I may earn a commission at no extra cost to you.
Check out my favorite diy earring essentials list on my Amazon storefront here!
Check out my favorite diy earring materials list on my Amazon storefront here!
My Favorite Cricut Machine Options


Cutting Tool and Accessory Essentials


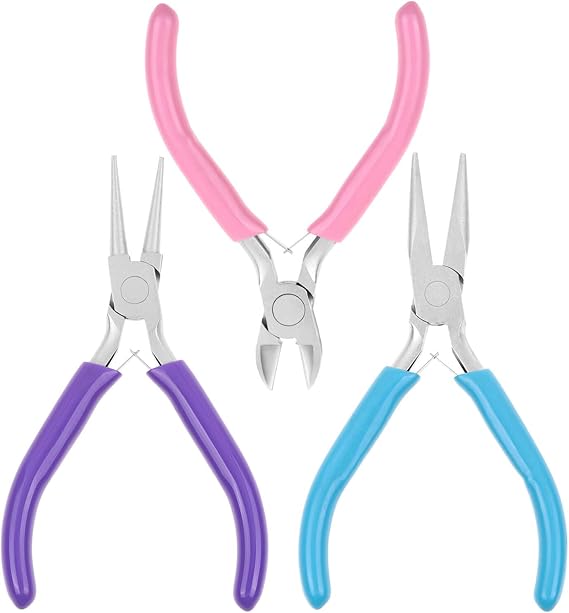
Must Have Earring Tools


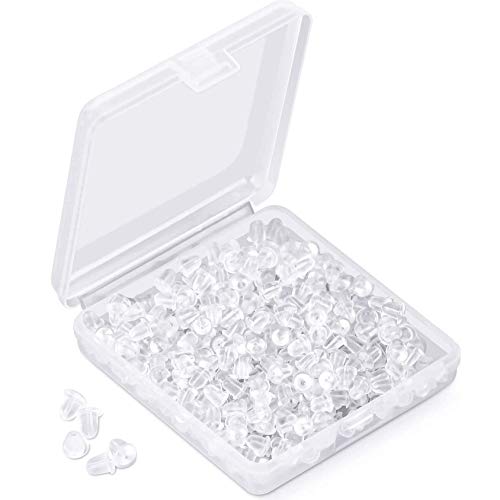
Must-Have Earring Findings

Heat Press Essentials


Heat Transfer Vinyl
I used to only purchase Cricut brand HTV; however, the colors are very limited. I know enjoy the large range of HTV colors available on Amazon. Check them out here.
Project Pictures
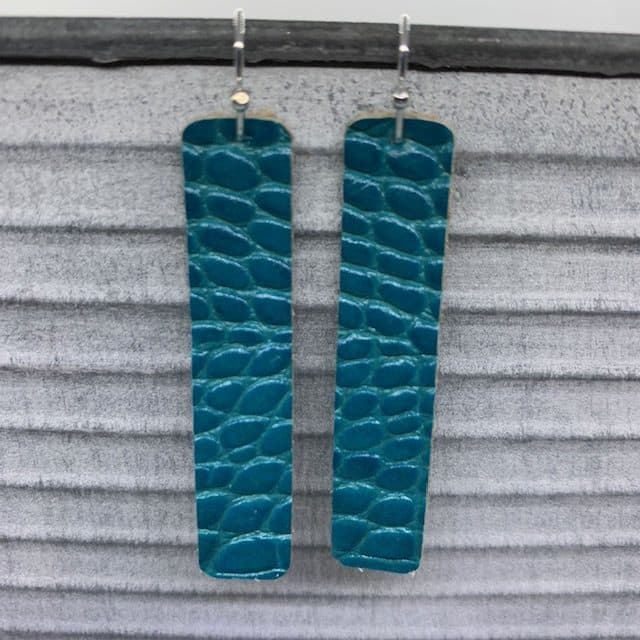
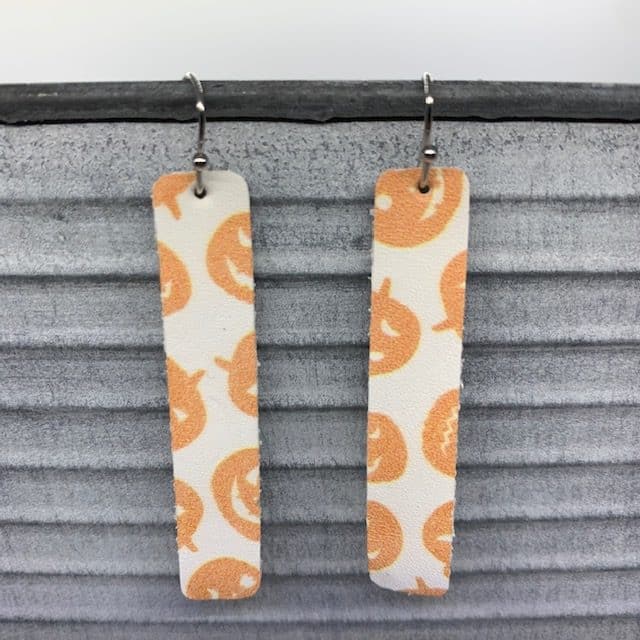
Instructions for making diy bar faux leather earrings are below. However, you can also make these cute earrings with genuine leather. I’ve included photos of leather bar earrings below as well.

Genuine Leather, Bright Braided Serape
Box of Genuine Leather Scraps from Amazon
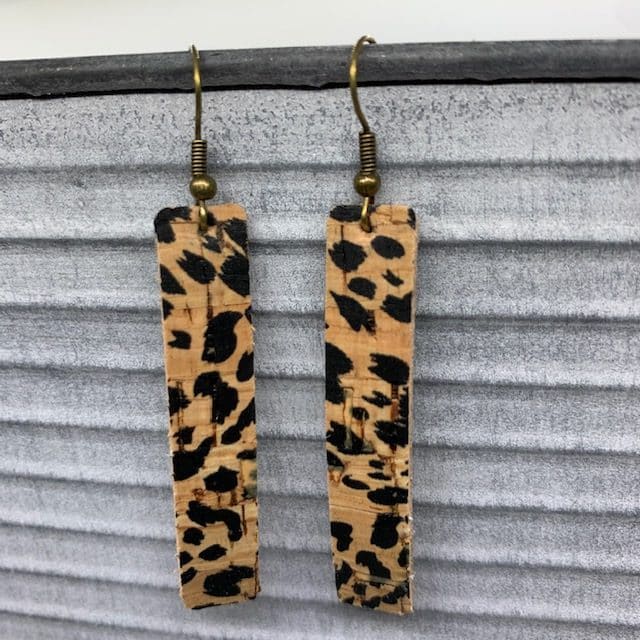
Genuine Leather back With Cork Front, Cheetah
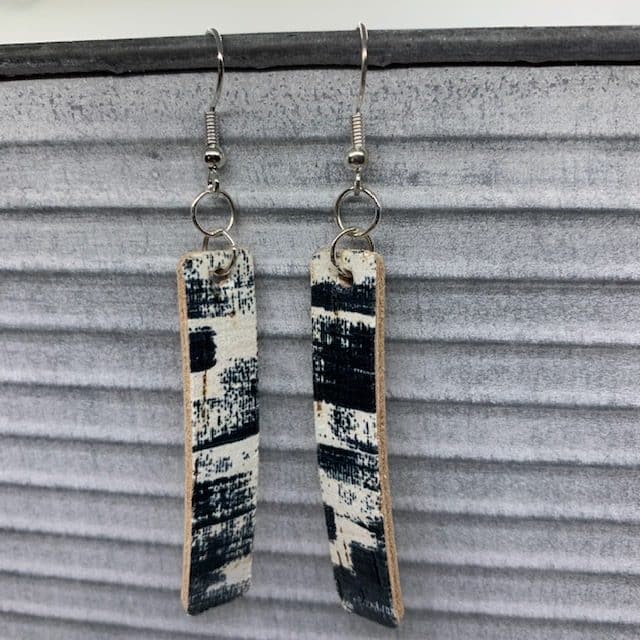
Genuine Leather back with Cork Front, Black and White Design
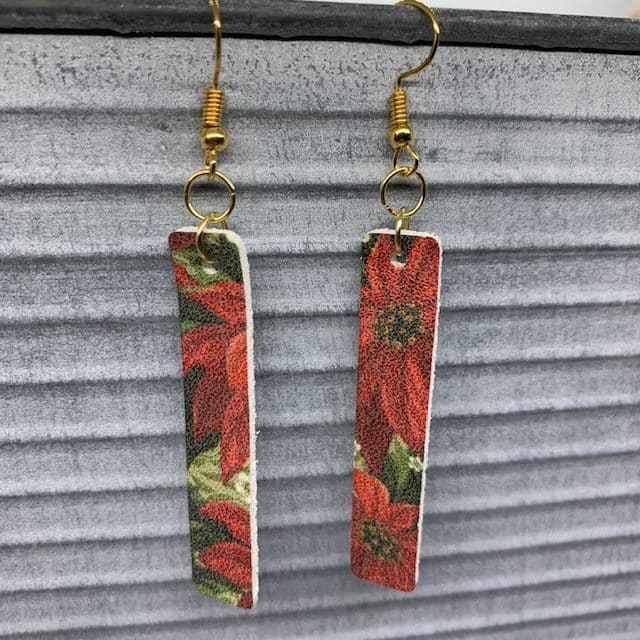
Genuine Leather, Poinsettia – Part of s a scrap kit
Find Something similar at FrogJelly
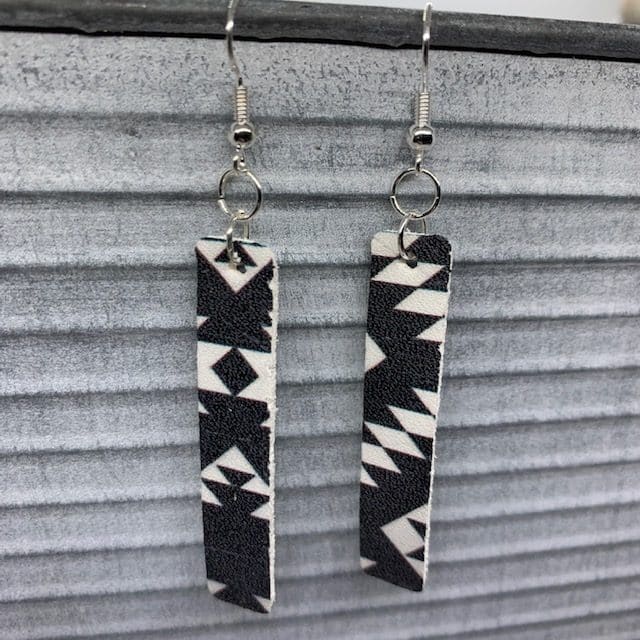
Genuine Leather, Black & White Pattern, part of a scrap kit
HOW TO MAKE EARRINGS
Select an earring template and upload it into Cricut design space.
You can find many templates for your earrings on Pinterest and Etsy. Many bloggers offer them for free and others are available for sale on the Etsy website.
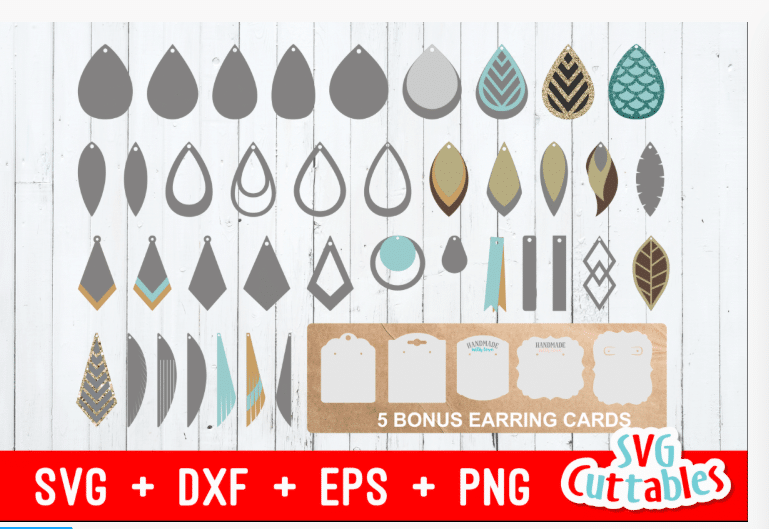
I bought this great earring svg bundle from SVG Cuttables. I’ve posted many earring projects using this bundle.
Pick your materials/colors.
I love to use faux leather and faux suede when I make this project. I chose the deep red, black, and tan colors from this Cricut faux suede pack for this post. The colors are perfect for Fall. This faux suede cuts so well on the Cricut machine because the setting is customized to this exact product.


Start a new project in Cricut Design Space.
Open Cricut Design Space and start a new project.
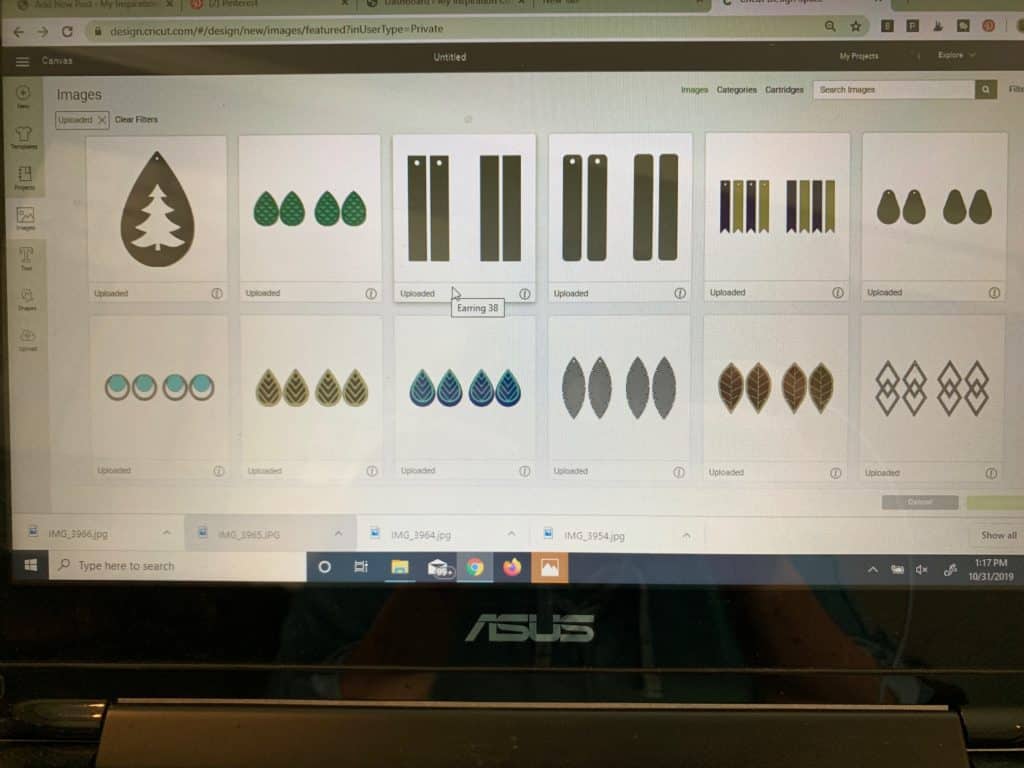
Insert the earring cut file image.
Upload the cut file for this project, using the upload icon on the left and navigate to the file on your computer..
I always recommend adding tags when uploading new files. If you think you’ll make a lot of earrings, add tags like “earrings” and “bar earrings.” This will make it much easier when you’re looking for the file in the future.
Insert the cut file onto the canvas of your new project. Tip: to easily find my upload files, I usually filter by uploads.
Once the file has been uploaded into Cricut design studio, click on the Images icon on the left. Select the cut file you want to use. Then, click on the insert image button in lower, right-hand corner. The cut file for this project is shown below (see blue arrow).
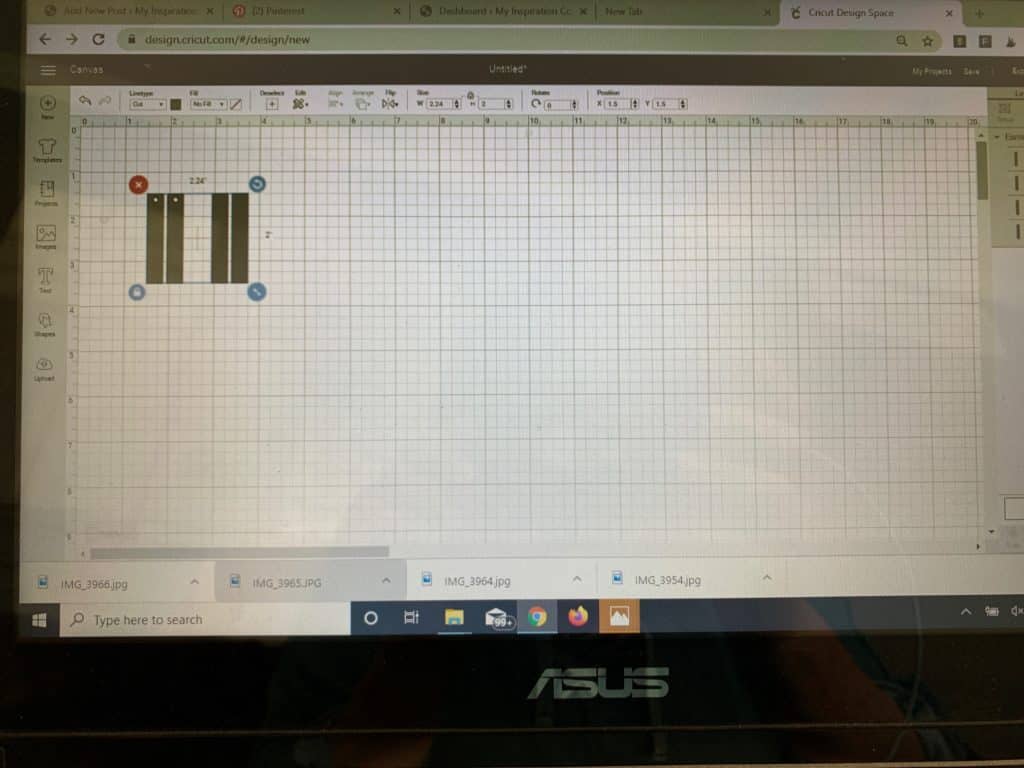
This is what is looks like after being added to your project.
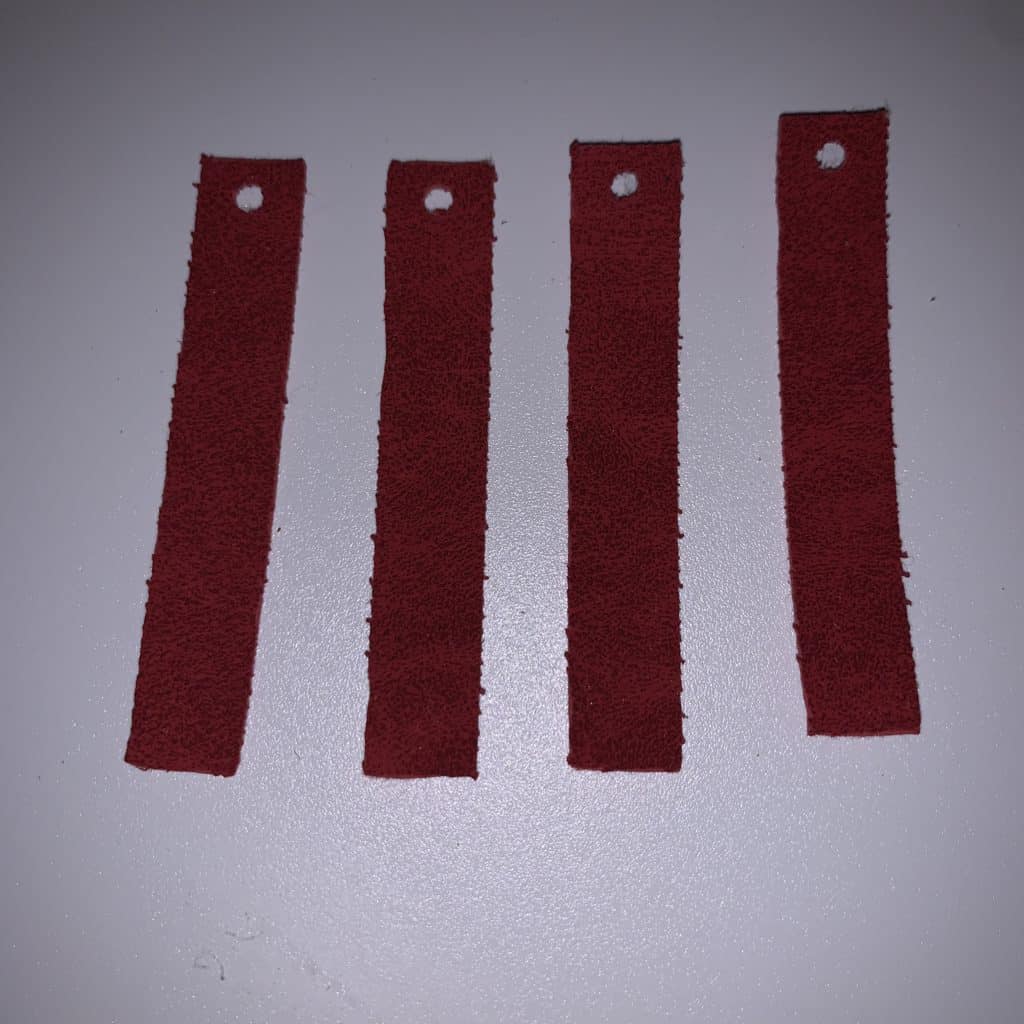
This file contains bar earrings with a hole and without a hole. You’ll need to Ungroup the earrings and then delete whichever ones you’re not going to use. I am going to use the ones with holes.

Re-size the earrings, if needed.
It is often necessary to re-size earrings when the file is added to the canvas. However, this file is already set with the dimensions I like (2″ tall and .4″ wide), so there wasn’t any need to re-size these earrings.
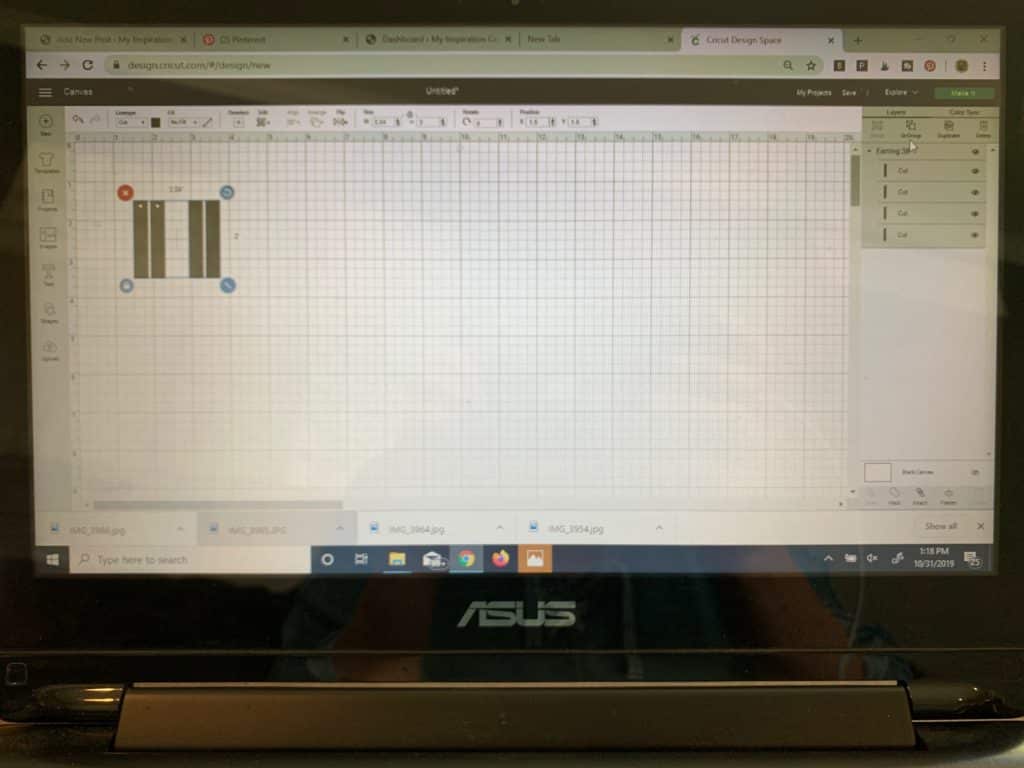
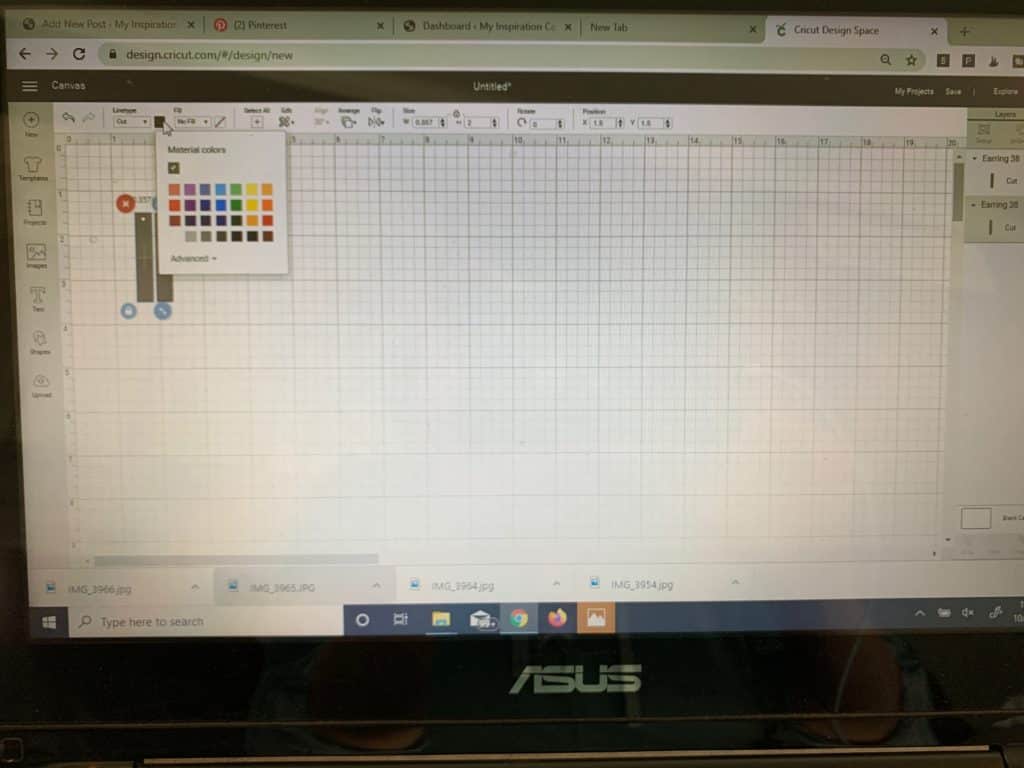
Change earring components to the right color.
This will help keep things clear when your putting different colors of leather and suede through the cutting machine. Sometimes, like in this project, the components are grouped together so you have to ungroup them before you can change colors. (The ungroup button is in the upper-right-hand corner.
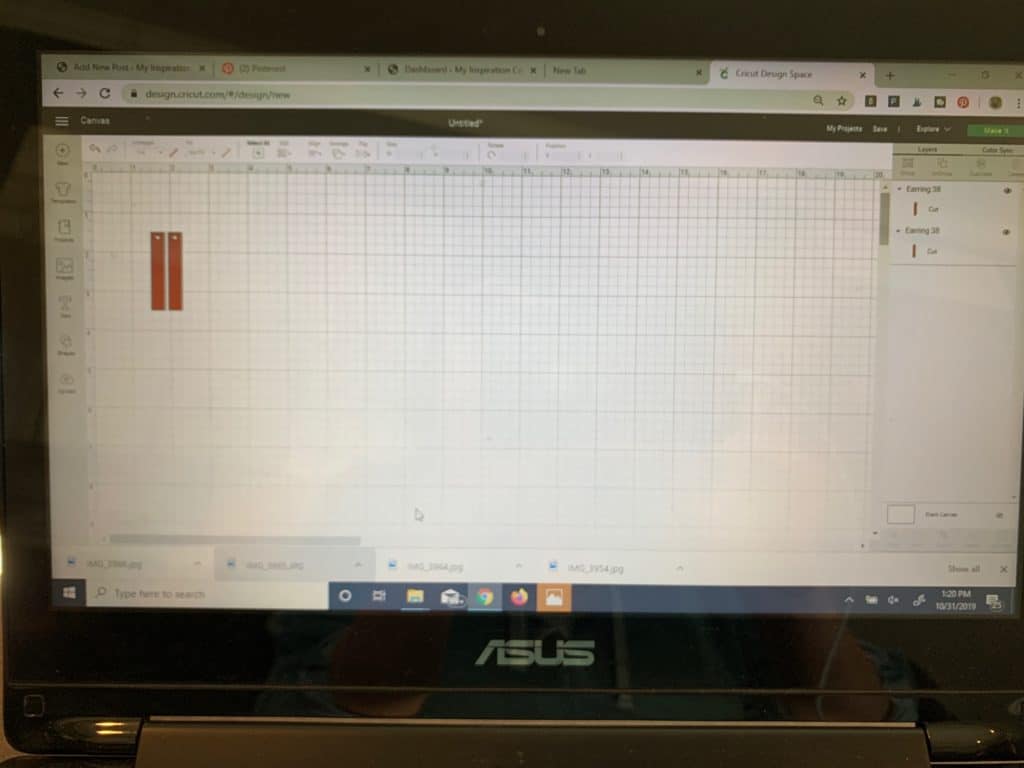
Duplicate images, as needed
You need to make an extra of each of the bars if you plan to glue two pieces back to back so that you can’t see the felt on the backside of the faux leather or faux suede. I like to do this in case the back of the earring shows. To do this, I take the following steps.
To do that, click on one of the earring components and then click the duplicate button. Repeat for each earring component.
MAKE IT
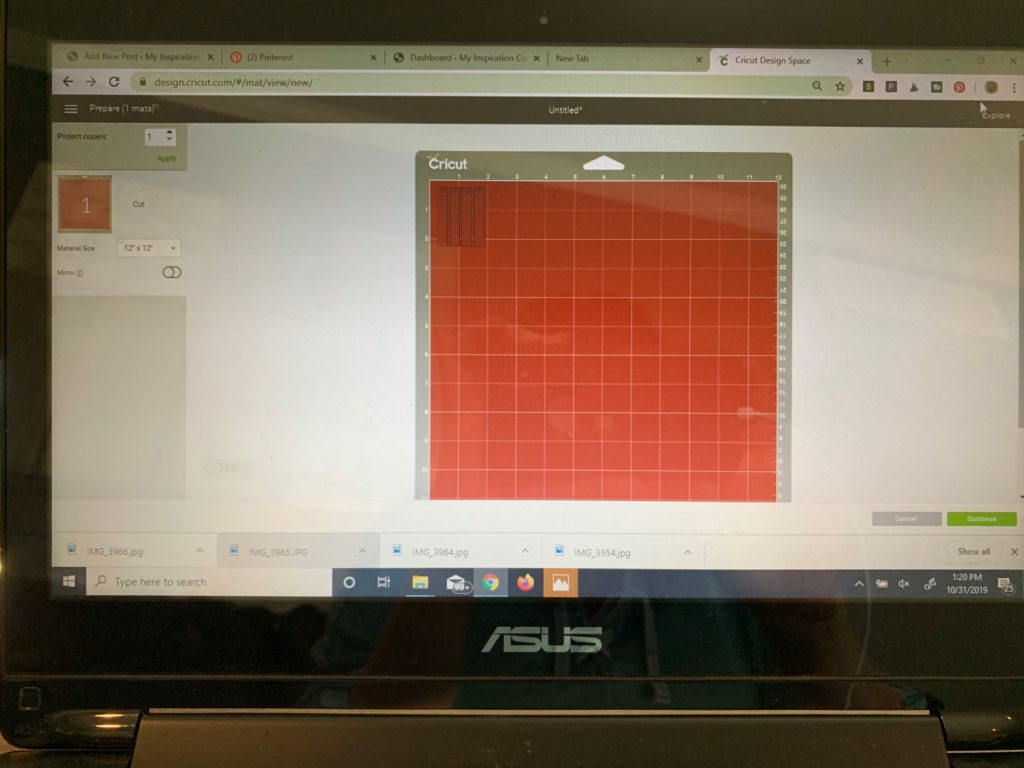
Once your mat has all the earring components ready to cut, click on the Make It button.
On the left you’ll see the different mats that will need to be cut, one for each color of faux suede in your project.
Mirror your design, if necessary
If your design isn’t symmetrical (same on both the left and right sides) you will probably want turn the mirror setting on if the good side of the faux suede is face down on the mat. That is an easy click on the mirror button for each mat you need to mirror. You don’t need to mirror this design.
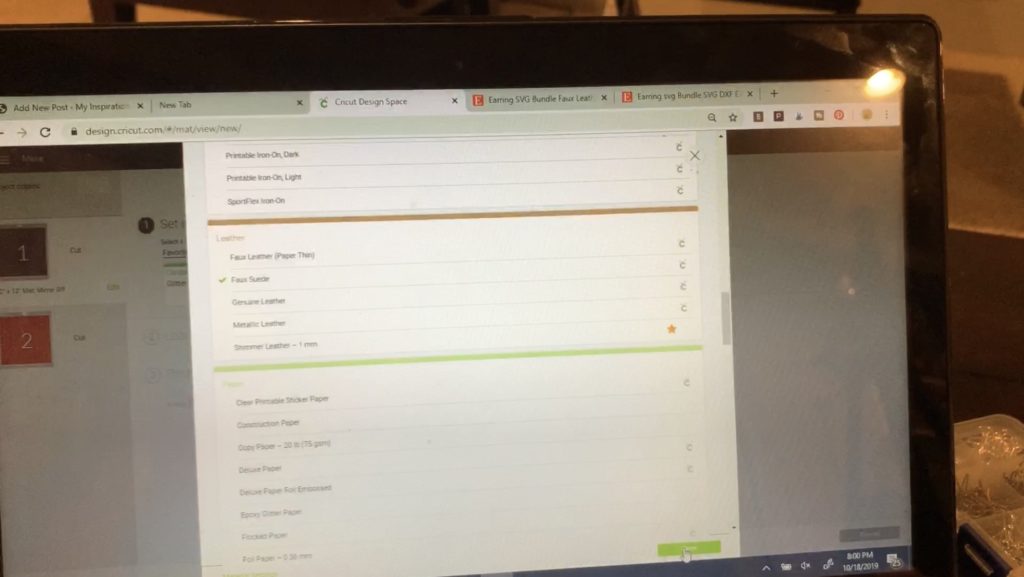
Make sure you have the machine on the right material setting.
Turn your dial to custom.
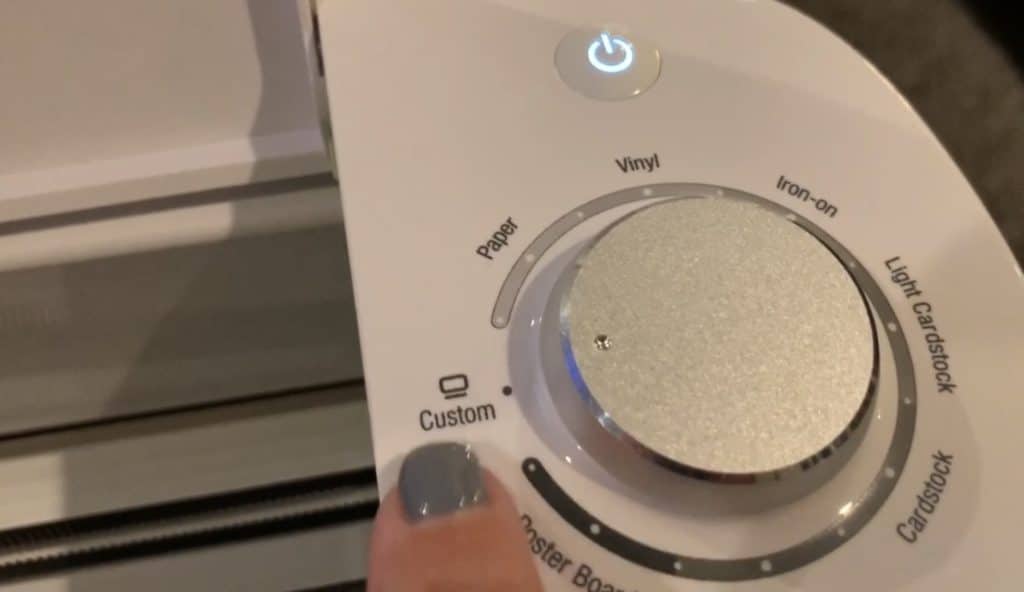
Select the right material from the materials menu in Cricut Design studio.
When you’re using Cricut brand faux suede, this step is always easy because the settings are standardized and always work well for Cricut products. When using other brands of earring materials (like Hobby Lobby faux leather ribbon) it sometimes requires you to play around to get the setting right. This is sometimes frustrating. When I share my projects I’ll always share the settings that I learn work with the materials I am using for that project. Hopefully this will save time and wasted leather material for you.
Click on the Browse All Materials link to see the menu of materials options on your Cricut. Select Cricut Faux Suede.

Move the star wheels.
The Cricut machine has star wheels to keep materials from shifting during cutting. However, when cutting thicker materials, the star wheels can leave track marks. When you select a material from the browse menu that is thicker, the Cricut machine will prompt you to move the star wheels to the right.
Push the wheels to the right. They may be on there tight so put some strength behind it.

Make sure you’re using the right blade.
You can print faux leather, faux suede, and leather on the Cricut Explore. When cutting Cricut’s faux suede, you can use the Cricut standard fine point blade. If you’re cutting genuine leather, you’ll need to use the Cricut deep blade.
Since this project uses faux suede, you won’t need to change your blade (if you’re currently using the normal fine point blade).
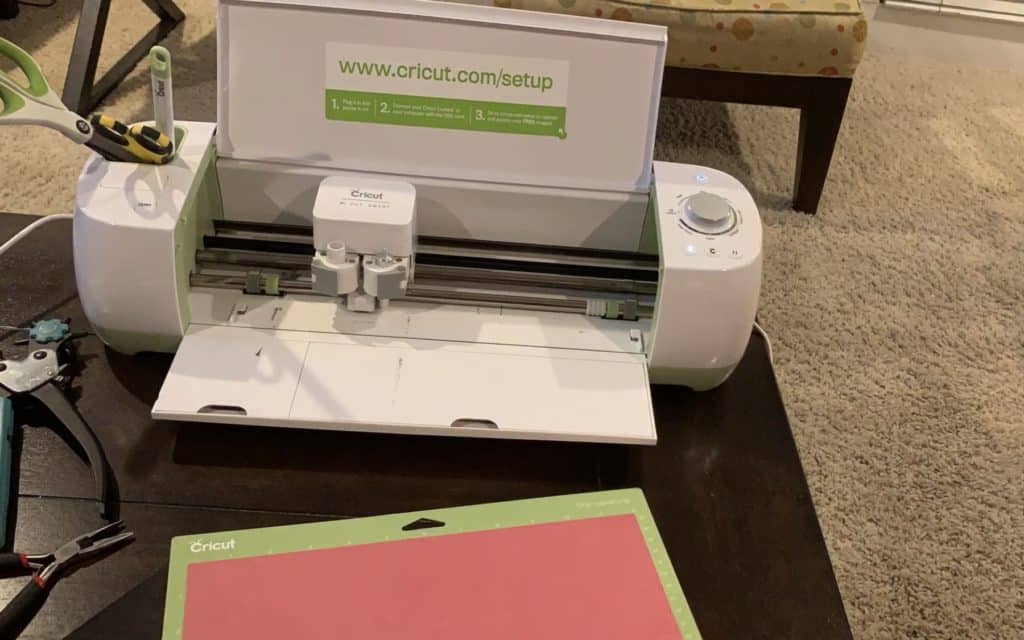
Place the material on the cutting mat.
Before you put the faux suede on the mat, you’ll want to look at the back of it to determine what is is made of. The back of this suede is felt. This means that it will leave a mess of fuzz when you take it off of your mat if you place it on the mat right side up. For this reason, I placed my faux suede on my mats good side down (when they have a felt back).
Also, I like to determine how much of the suede will be cut. Typically, it is less than 3″ of material, meaning only about 3″ of the mat needs to be exposed. I then place my plastic mat cover back onto my mat about 3″ down from the top of the cutting area. I do this so that I don’t put the suede or leather on top of the mat where I’m not cutting it. This keeps me from losing the stickiness on my mat. I don’t like to pre-cut my leather/suede because I want minimize waste of the material.
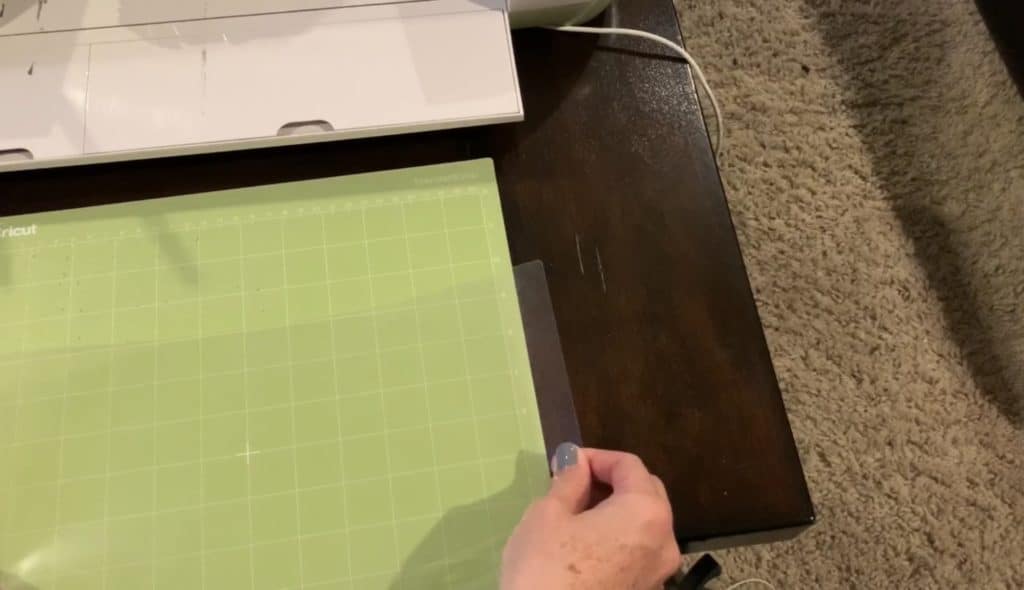
Once I place my plastic on top of the mat, I put the suede onto the mat.
After placing the faux suede on the mat, you can use a Cricut Brayer roller to press the faux suede onto your mat. I don’t have one of those so I use a dough roller.
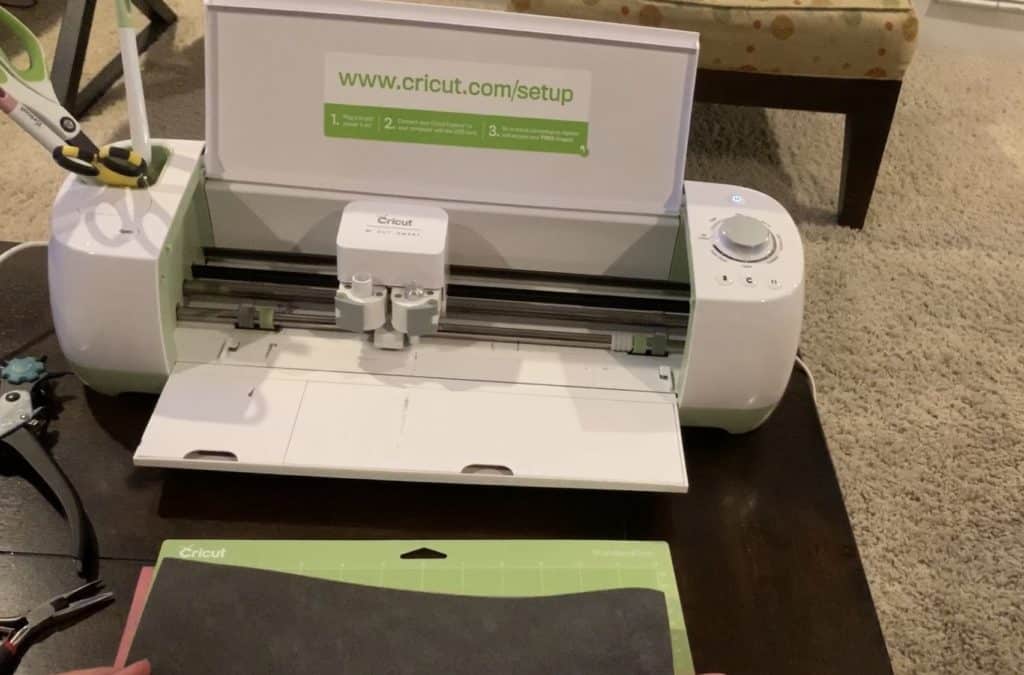
Continue placing the leather onto each mat and cutting the faux leather with the Cricut machine.
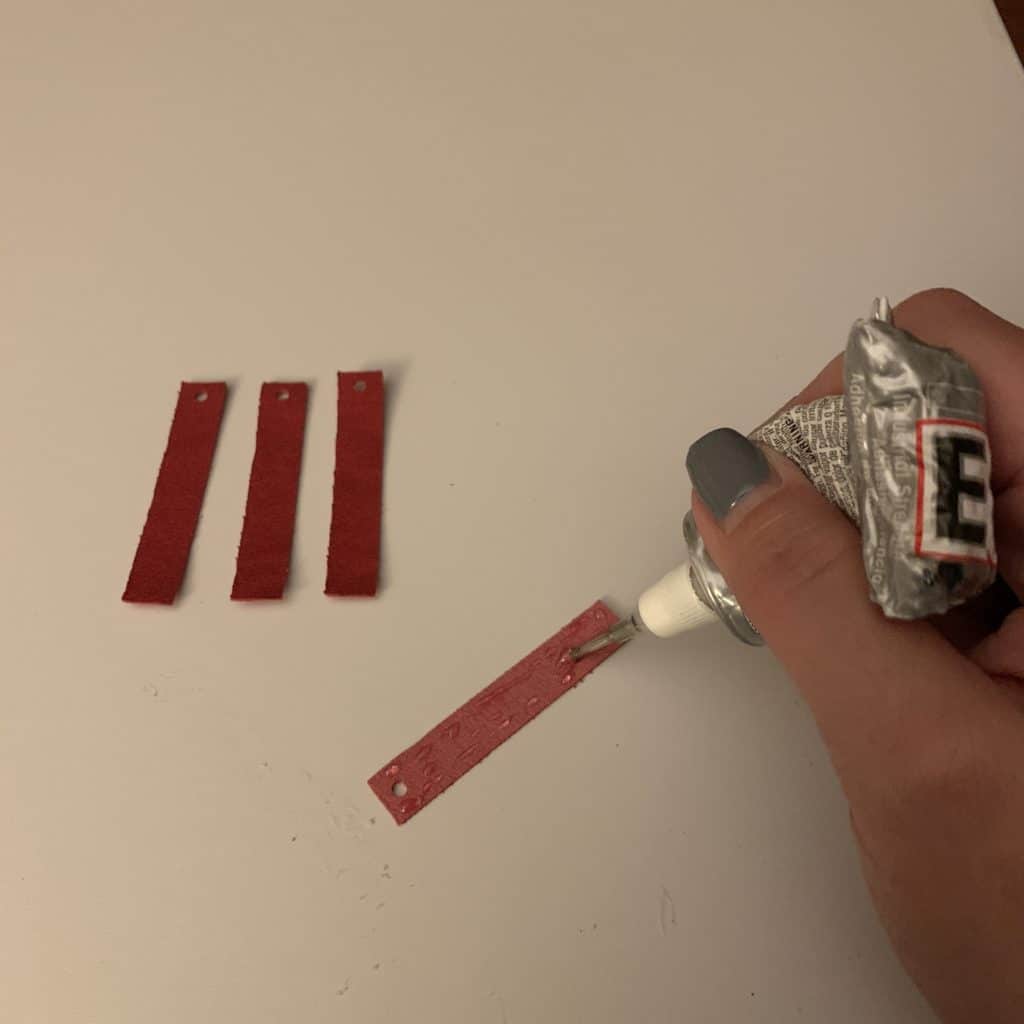
Glue earring pieces together, if necessary.
As I mentioned earlier, the back of some faux leather and faux suede earrings aren’t very attractive as they are felt. I often cut an extra faux leather or suede piece for the back of the earring and I glue a second piece to the back of it. This way if the earring turns, the felt isn’t exposed.
To do this, I glued two earrings together using E6000 glue.
While I did use E6000 glue on this project, I actually prefer to use Crafter’s Pick Fabric glue when gluing faux leather pieces together. It doesn’t dry quite as fast, giving more time to get the pieces of leather positioned correctly.
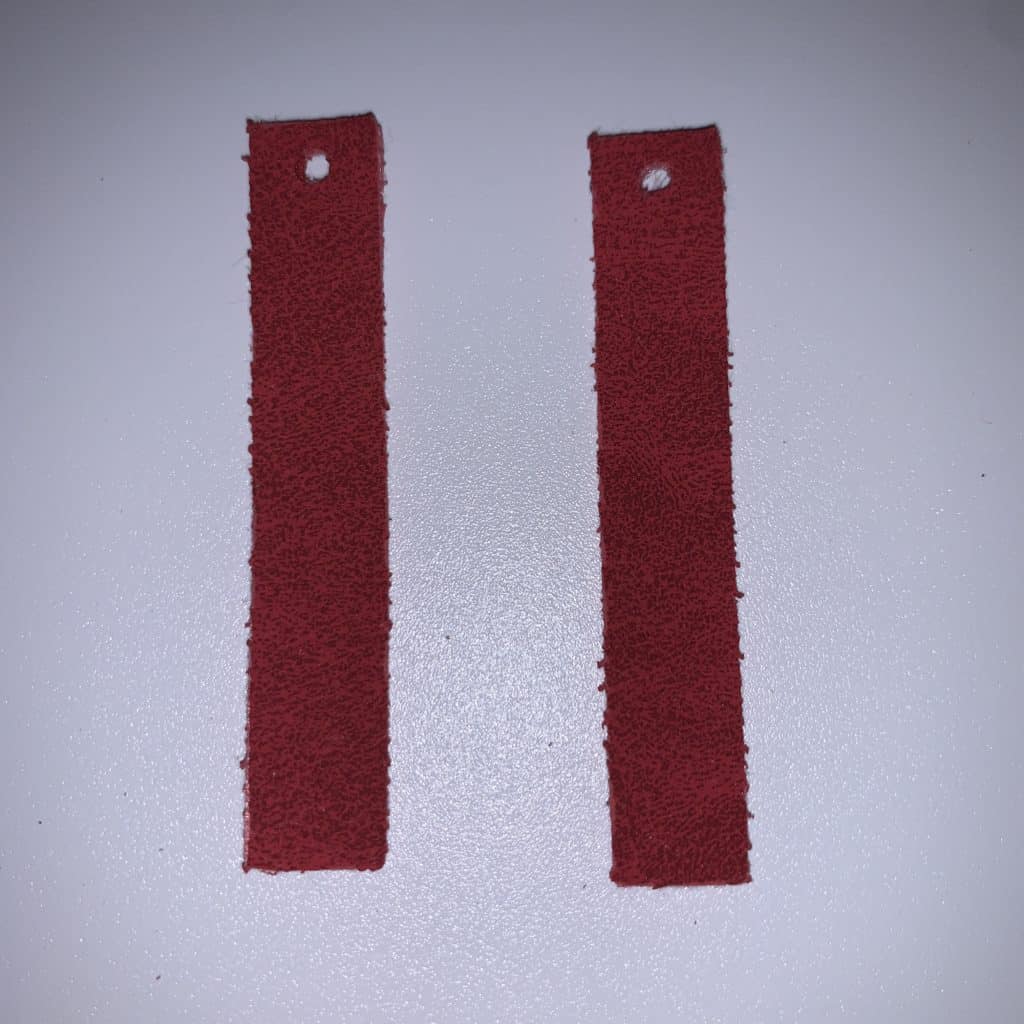
Trim any felt, fuzz, or glue from the earrings.
Using a pair of sharp scissors, trim fuzz from around the earrings.
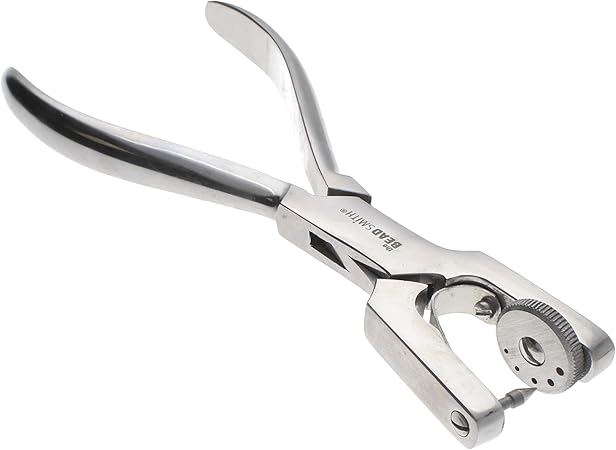
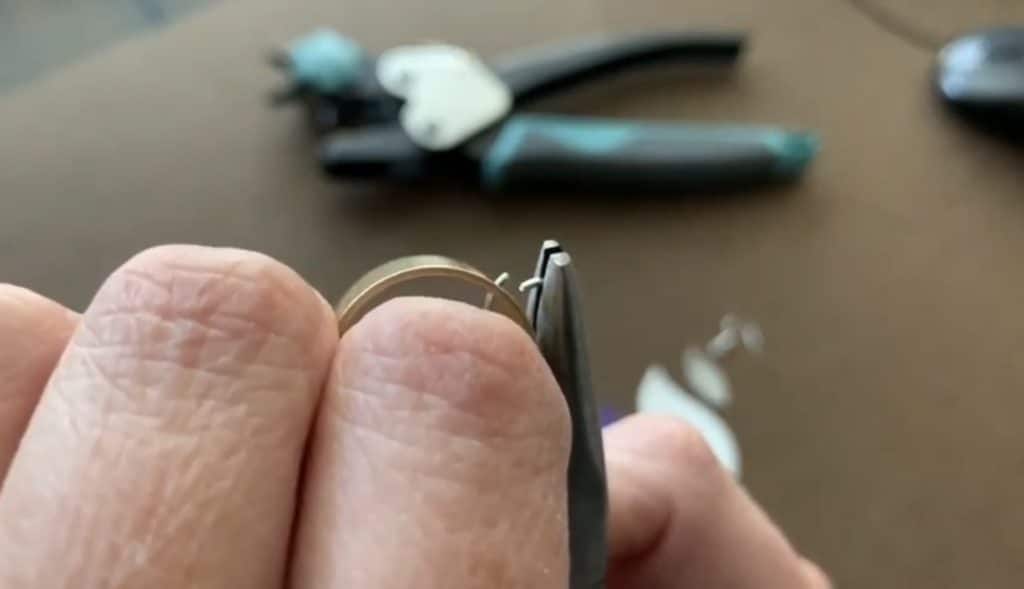
Place a hole in the top of the earring.
I normally use a leather punch to put the holes in my earrings when the cut file doesn’t already have a hole. The tool linked above cuts through multiple layers of the earring at the same time. You can also use Cricut weeder tool to put a hole through faux leather and faux suede, but it is best to go through just one layer at a time if you do this.
For this project, I used templates that had holes precut. For the most part, these cut out pretty well. Sometimes, you’ll need to snip a small part of the hold that doesn’t cut all the way through.
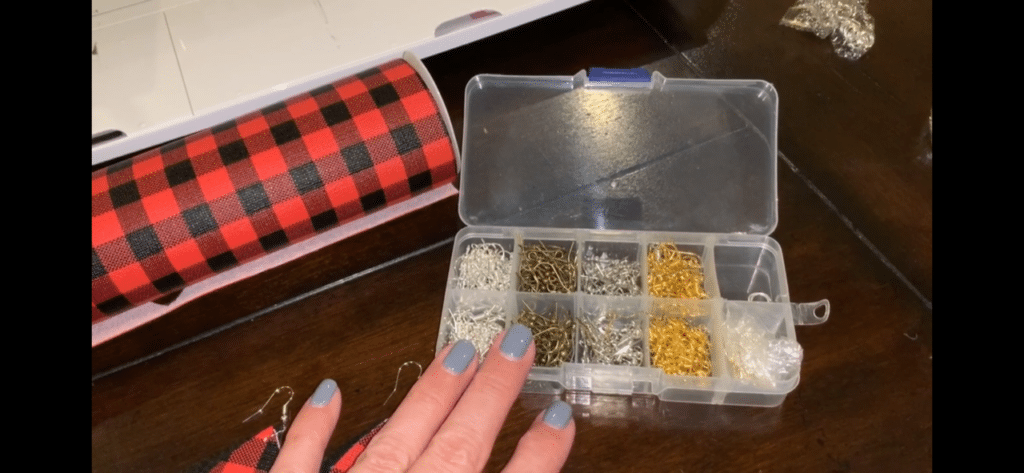
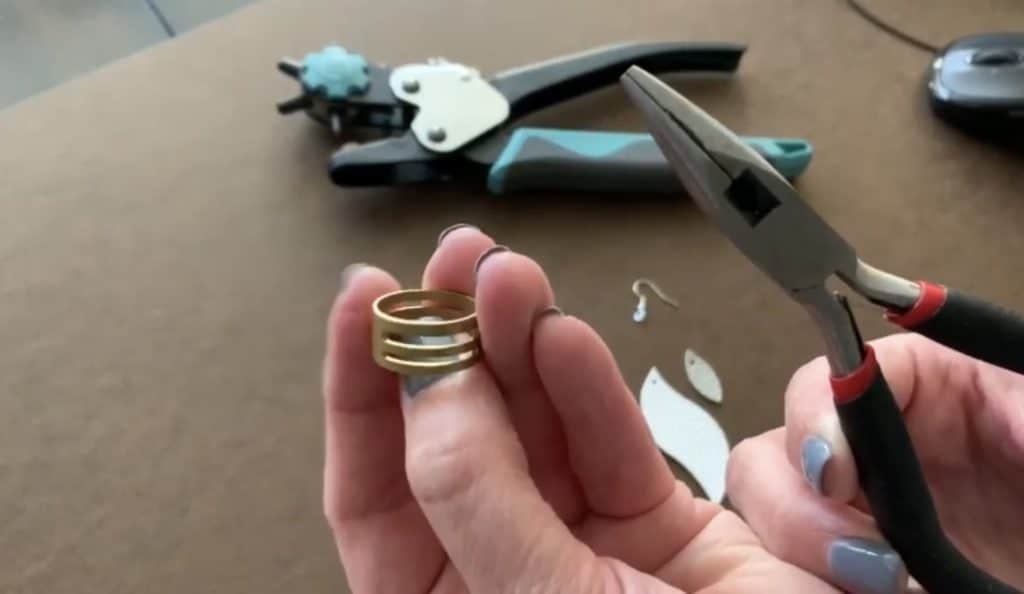
Gather necessary earring components and tools to finish your diy faux leather earrings.
It doesn’t take much to put together earrings. You either need a couple of pairs of pliers or a jump ring tool and one pair of pliers. You can get the two tools below along with a full kit of earring hooks and jump rings on Amazon. It is the perfect starter set. Great for you if you’re getting started and a great gift for anyone that likes to DIY.

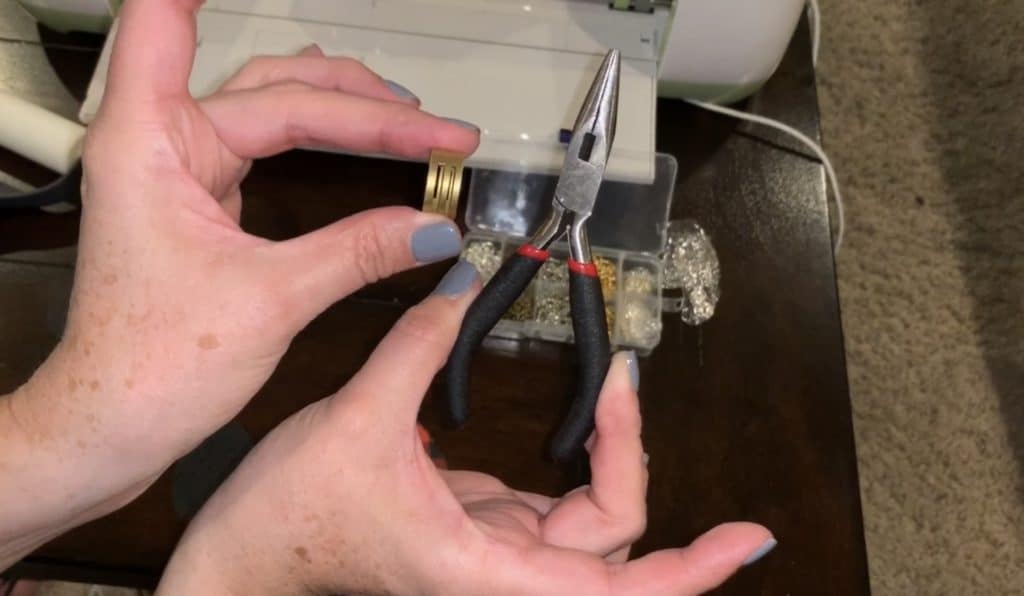
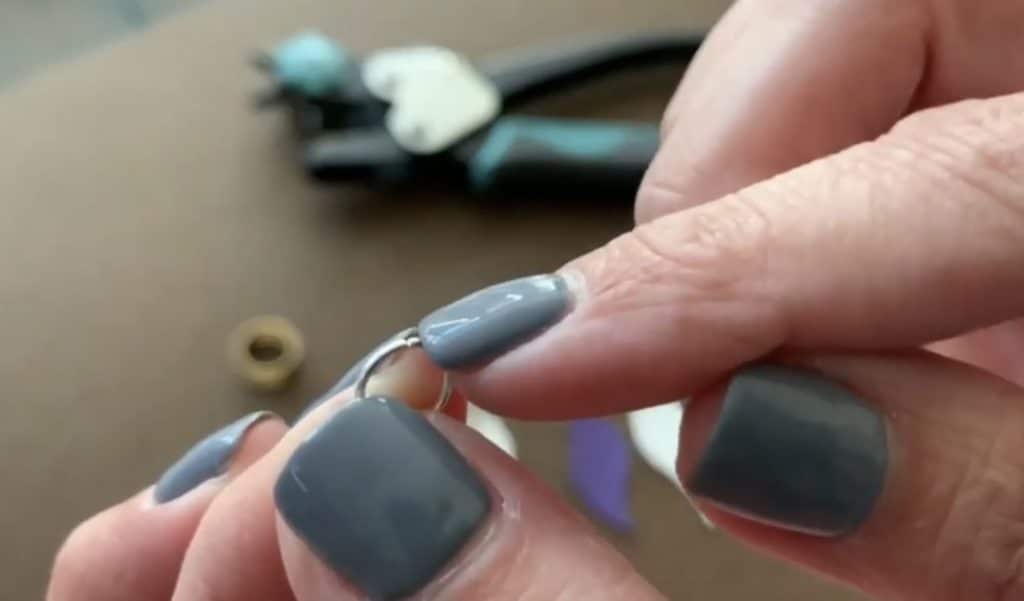
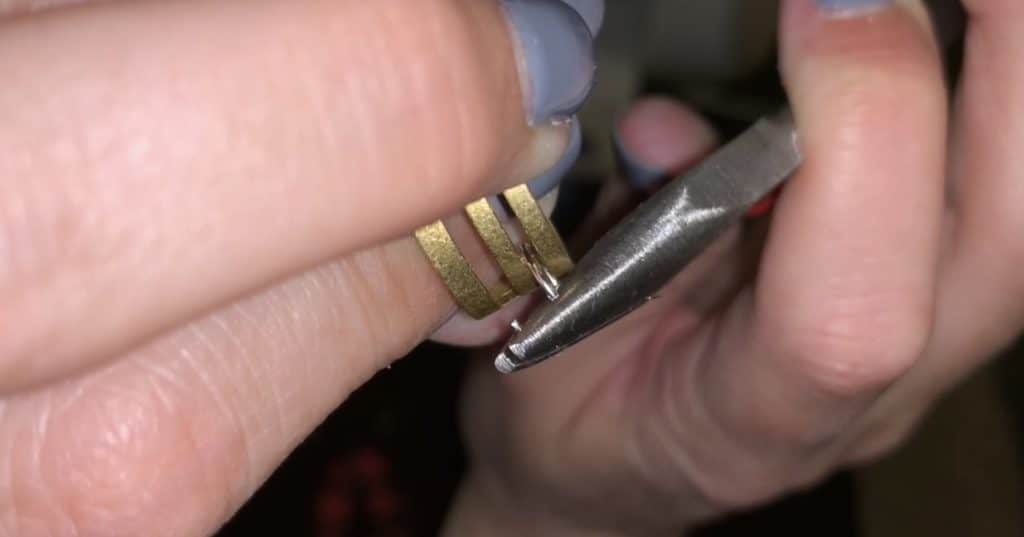
Open the jump ring.
A jump ring isn’t closed. This means with the right tools, you can open it to put on the earring components.
These are the two tools that I use to open and close my jump rings.
I hold one side of the jump ring with my pliers. With my other hand, I use my jump ring tool to push one side of the jump ring back (to open).
It is important not to open the jump ring by pulling them to the left and right. If you do it that way, it will be hard to close the jump ring, while keeping the shape. Instead, push the ring back/front to open the jump ring.
Note: If you’re using the jump ring tool, find the slot on the tool that is sized right for the jump ring.
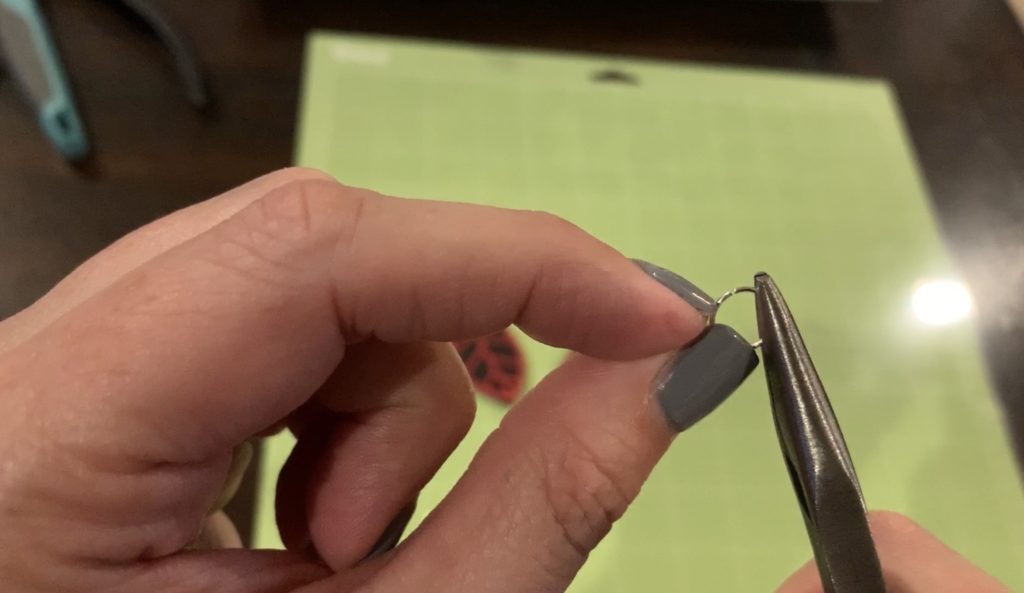
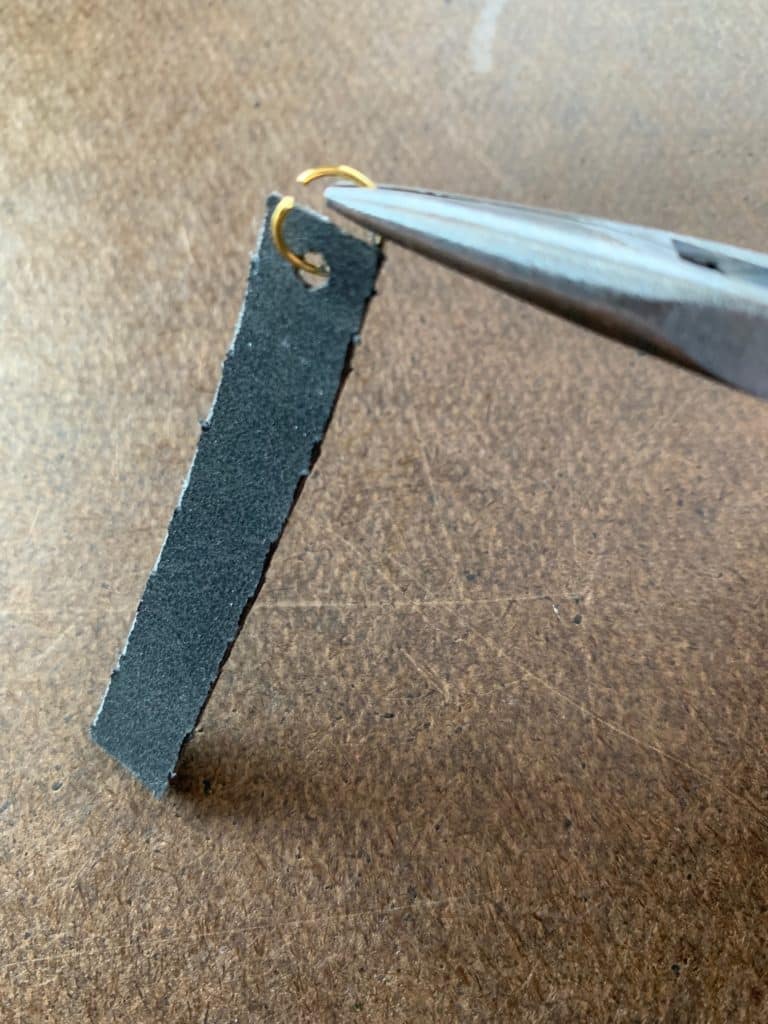
Put the pieces of faux suede onto the jump ring.
Then attach a jump ring to the earring hook. I like to do this because it helps my earrings to face the front versus twisting/sideways facing earrings.
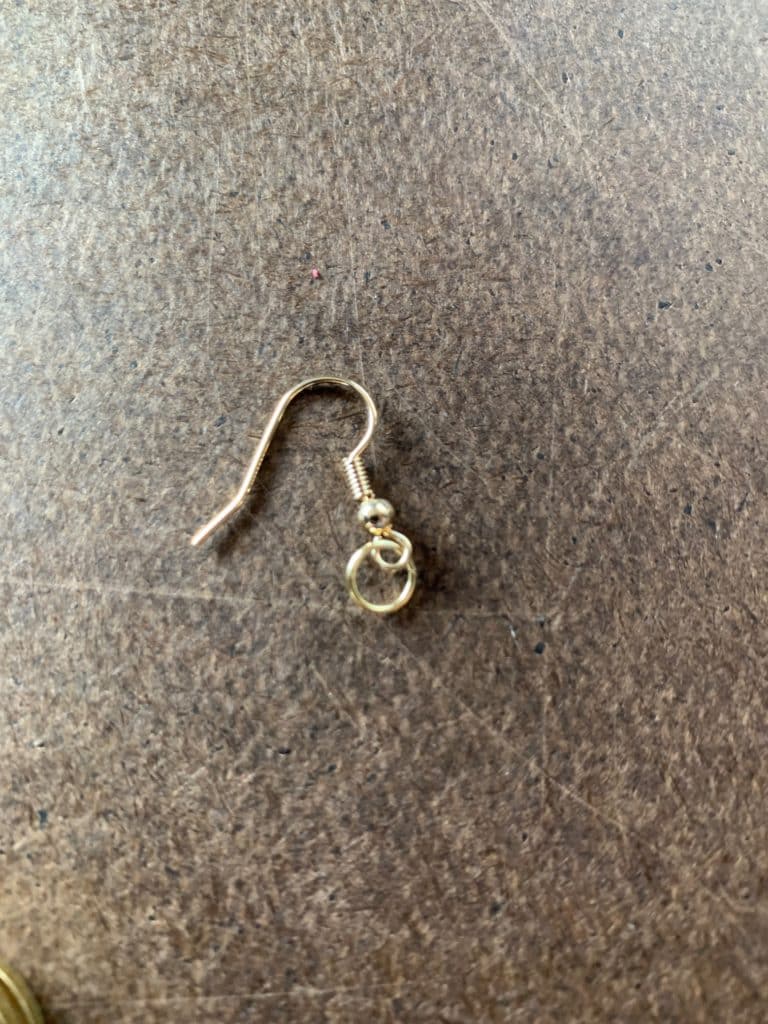
Attach the jump ring that you attached the earring hook to the jump ring that your earring components are on, making sure your hook faces the right direction before closing the jump ring.
Using the pliers and jump ring tool, close the jump ring.
And that’s it! Your diy faux leather earrings are done! I made a lot of these with different color combinations.
These diy faux leather earrings are fun to customize with various color! They make great earrings to show spirit for your school or favorite sports team.
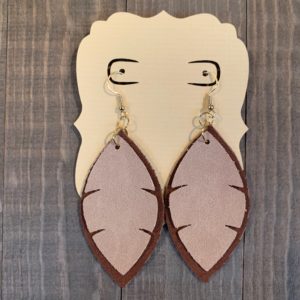
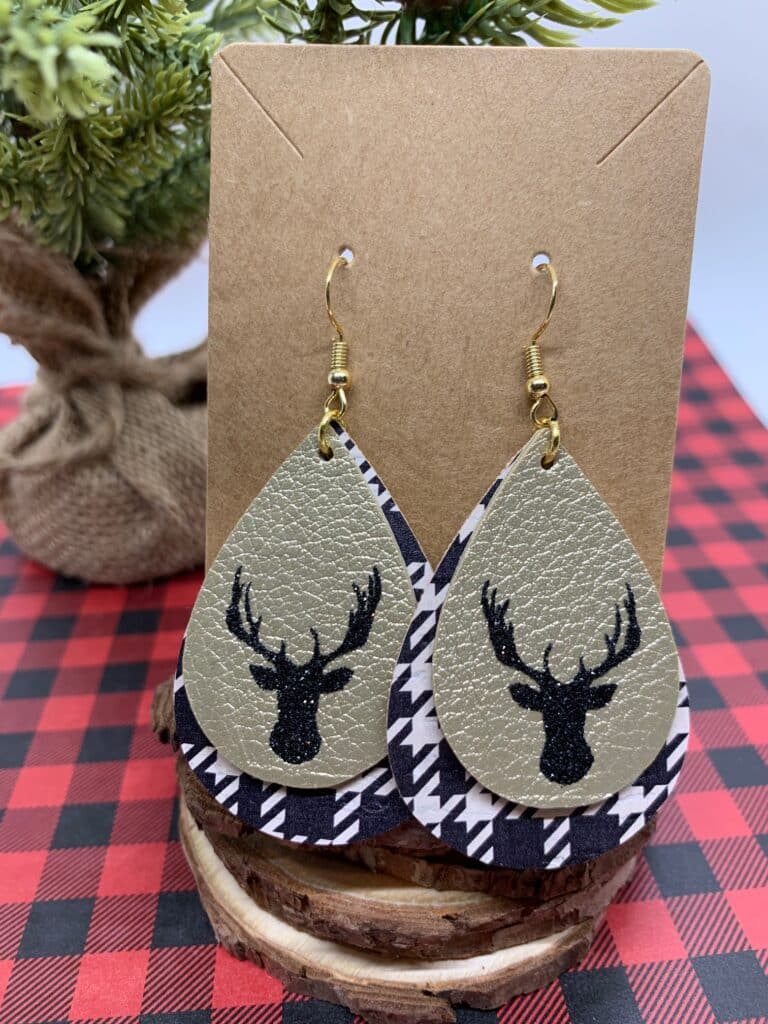
Check out my other DIY faux leather earrings projects:
Everyday Earrings
- How to Emboss Leather Earrings
- DIY Angled Fringe Earrings
- Leather Circle Earrings
- DIY Fringe Leaf-Shaped Earrings
- Cross leather earrings
- FRI-YAY Leather Earring DIY
- Leather Bar Earrings DIY (with metal charm)
- How to Make Genuine Leather Earrings
- Statement Earrings
- Teardrop Cork Earrings
- Hollow Faux Leather Earrings – Teardrop and Leaf Shaped
- Cork Sheets Haul: For DIY Cork Earrings – Great Designs!
- Faux Leather Tall Stacked Earrings
- Split Teardrop Faux Leather Earrings
- Faux Leather Stacked Marquise Earrings
- Football and Soccer Earrings
- Stacked, wavy earrings – KSU
- Faux leather leaf cutout earrings
- Faux Leather earrings with fringe
- Faux Leather Teardrop Earrings
- Faux Leather Bar Earrings
- Faux Leather Leaf Earrings
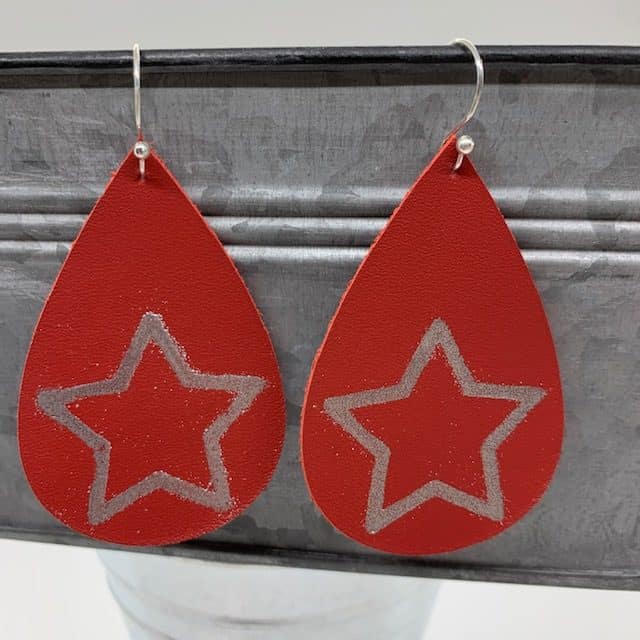
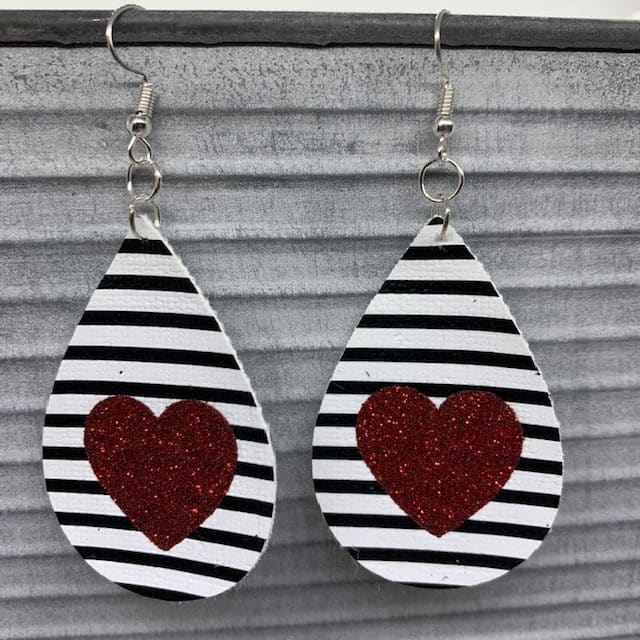
Valentine’s Day Earrings
- 0 Great Valentine’s Day DIY Earrings
- LOVE Leather Earrings DIY
- Valentine’s Day earrings DIY (heart shape)
- Heart Earrings DIY (Iron On)
- Heart Earrings DIY (with heart cutout)
- DIY Valentine’s Day Earrings
St. Patrick’s Day Earrings
Winter Earrings
Holiday Earrings